Finally, here is Part 5 of the Windows Clustering series that we have been working through. I’ve been working on some other things and took a brief vacation so it’s a bit overdue, but better late than never, right?
To recap, the previous parts were as follows:
Now, before we get started I want to set some expectations regarding this installment. At this point we are going to take an application and cluster it using the “Generic Service” role. Since we have a SQL cluster which we built earlier, and this blog will deal with an application cluster, it would be good to cluster an application that has a service which uses a database. This way we can exercise all part of the solution we have been creating.
Since I work for 1E, and our products have services and use SQL databases, it makes sense that I would use one of our products as the application to be clustered. I will be using NightWatchman, our tool for efficient PC Power and Patch Management.
The overall methods we will use here to configure NightWatchman as a generic service will work similarly when clustering other applications, so what is presented here will be applicable elsewhere. Every application installation is going to have specifics that will require some additional work to keep them working optimally in a clustered setup, so this blog will keep the creation of the clustered generic service fairly generic.
We have set up NightWatchman in clustered environments for customers, but it is important to make note that 1E cannot provide support for clustered installations unless they were done with involvement from 1E Professional Services. In order for the solution to work properly the components need to be configured with some specifics in mind, and our support team needs to be aware of the configuration of a customer's clustered environment.
With all that said, let’s get to building our application cluster.
I have to say, this installment is really feeling like a cooking show. We have already connected to our shared storage, configured the disk in the OS on the prospective cluster nodes, and created the Windows Failover Cluster, just as the first three blogs in the series outlined. Our SQL cluster is already set up. All of the prep work has been covered and completed, and we are ready to pull the proverbial cake out of the oven and finish it up.
After configuring the prerequisites for the application, in this case NightWatchman Management Center, it is time to install the application. From the beginning in the first post of this series I said it was important to set up the cluster nodes in the same way in order to ensure that any failover would not be inhibited by a difference in servers. If an application runs on one node it should run on any of them if they are all set up the same way and, after all, that is the point of a cluster, isn't it?
You recall that in Part 4, when we created the SQL cluster the SQL Server software was installed on one cluster node and then the other. The application will be installed in the same manner. So a custom installation of NightWatchman Management Center was performed on one of the application's Windows Failover Cluster nodes and then the other, being careful that only one instance at a time had access to the database. Once the NightWatchman Management Center is installed on both nodes it is possible to create the Generic Service role for NightWatchman in the cluster. The following table outlines the process.
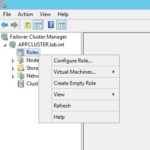 |
Open the Failover Cluster Manager application and open the High Availability Wizard.
- Expand the cluster object
- Right click on the Roles node
- Select Configure Role… from the context menu
|
 |
Click Next at the Before you Begin screen |
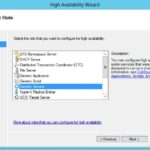 |
Select Generic Service from the list of roles and click Next at the Select Role screen |
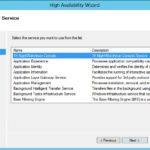 |
Select the service that will be clustered (in our example the < b>1E NightWatchman Console service) in the Select Service screen |
 |
At the Client Access Point screen, configure the service with a Name for the clustered application and an IP address to be used when accessing the application |
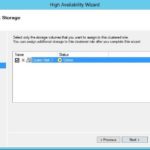 |
Select a clustered disk to assign to the role in the Select Storage screen. This disk will hold any common file system items that must be failed over when the application is failed over between cluster nodes. These file system items can be things such as log files, configuration files, or temporary locations. It all depends on the requirements of the application. The application may need to be reconfigured to used shared storage for these file system items, and it may be necessary to create folders and file manually on the shared storage for use by the application. |
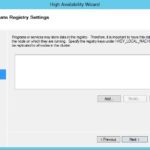 |
Specify any registry keys that need to be replicated between nodes for use during a failover situation at the Replicate Registry Settings screen. Unfortunately, as with many things in IT, I can't give any specifics here. The answer is "it depends". As with the file system items in the previous screen, it all depends on the requirements of the application being clustered. |
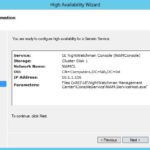 |
Finally, you will be presented with the Confirmation screen, where you should verify the information shown and click Next |
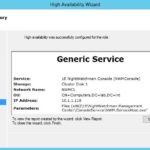 |
The Generic Service will be created in the cluster, making your chosen application part of your cluster. Review the Summary screen to verify that the role was configured successfully and click Finish to close the High Availability Wizard |
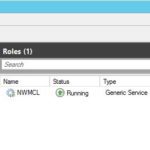 |
The Generic Service role now appears in the Failover Cluster Manager console as shown. Note the Owner Name, specifying the Node that is currently running the service. |
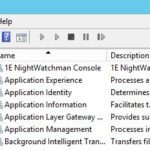 |
Looking at the services on the node specified as the owner in the previous step you will note that the service (in this case 1E NightWatchman Console) is running and the Startup Type is set to Manual. A clustered service will use a Startup Type of Manual since the cluster takes responsibility (over the OS) for starting the clustered services. If you look at the other node it may still indicate an Automatic Startup Type but there is no cause for concern. The cluster service will correct that without any need for intervention. |
And now the application is clustered. We can then move on to testing the application to verify that it fails over as expected.
We will initiate failover just as we did in Parts 3 and 4, where we tested the Failover cluster and the SQL cluster. This involved disconnecting the network connections for the node that was listed as the owner of the resources, which caused an unexpected failure.
As you recall, we do not want to perform a shutdown or stop the cluster services. While either of these actions will cause the application to move to the other cluster node, this is not a legitimate failover test. The cluster service will move the roles and resources to the other node of the cluster when it knows that it is going down. We want to yank the proverbial carpet out from under the node to test what will really happen if it fails.
Also, as we did previously, monitor the cluster from the node that does not own the roles and resources. This way, when we cause the owning node to fail, we can still watch the cluster. Watching the role for the clustered Generic Service (NWMCL in our example) we see the status change, with the Owner Name changing from the original node to the new node name. The screenshot below shows an interim state.

The application cluster can be failed over in this way, and you can monitor and verify your application's functionality through the failover operation by looking at logs and opening the application's console to check for continued functionality. I certainly did that here, and the NightWatchman Management Center continued to function after the application cluster nodes were failed back and forth.
In our example we also used a clustered database. In Part 4 of the series where we clustered the database I alluded to the fact that an application could be set up to use the database and that the application's functionality could be verified while failing the SQL nodes back and forth. The same failover tests used in that blog were used again after the application was set up, and the NightWatchman Management Center continued to function as the SQL cluster nodes were failed back and forth.
And that is the basic walkthrough of setting up a Generic Service in the cluster to cluster an application. As I said, I used NightWatchman because it was handy and, since I work for 1E, I am familiar with the details of setting it up. The same basic process can be used to cluster other applications as well, keeping in mind that each application has it's own specific configuration requirements, just as there are specifics about NightWatchman which need to be addressed during cluster configuration.
One final note. Failover Clusters are suited to more dynamic applications, such as database and email applications. In the event that you wish to cluster a more static application the use of a load balancing device or an NLB cluster will be necessary. In the final part of the series we will take a look at creating a simple NLB cluster to provide load balancing/failover for an IIS site. Until then, all the best to you all!


